Spicy Braised Korean Chicken Stew
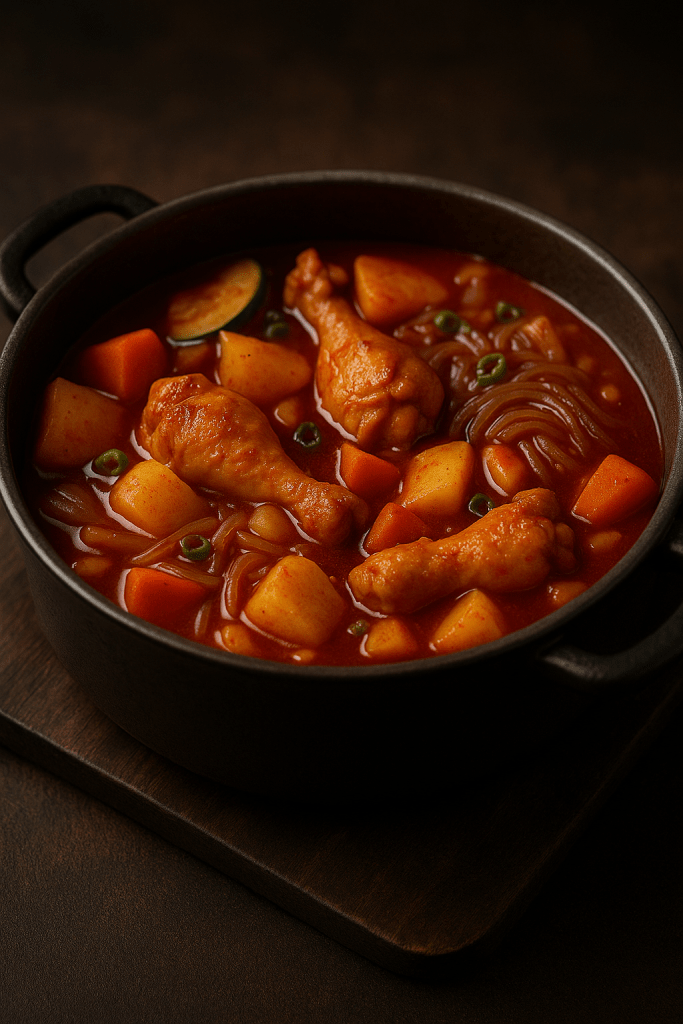
A hearty Korean chicken stew simmered in a rich, spicy sauce with tender vegetables and glass noodles.
This dish warms you from the inside — perfect for chilly days or when you crave something bold and comforting.
감자, 당근, 양파, 당면을 넣고 매콤하게 끓인 닭볶음탕이에요.
국물이 자작하게 졸아들며 깊은 맛이 나고, 밥 한 공기와 함께 먹으면 최고의 집밥 메뉴입니다.
🍗 Ingredients | 재료
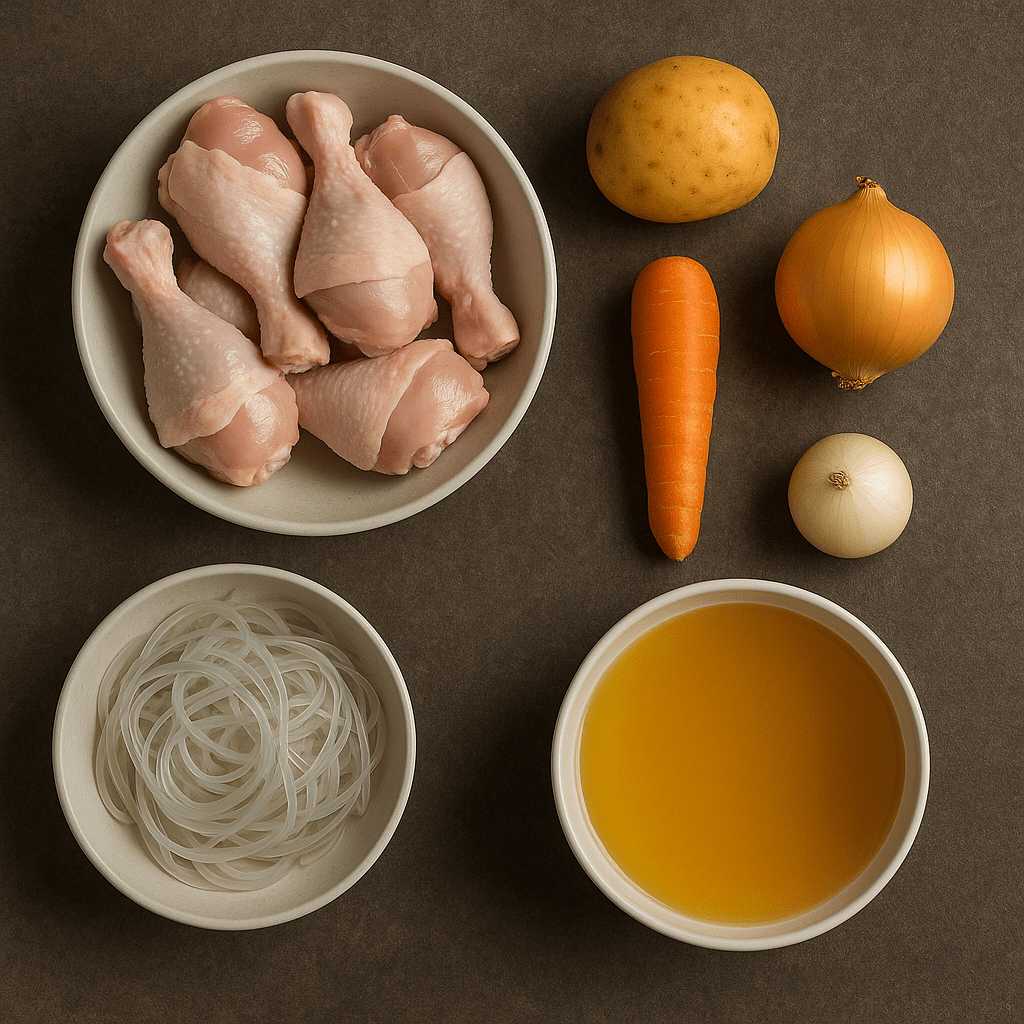
- Chicken drumsticks or pieces (bone-in) | 닭봉 또는 닭조각 (뼈 있는 부위 추천)
- Potatoes 1–2 | 감자 1~2개
- Carrots 1 | 당근 1개
- Onion 1 | 양파 1개
- Glass noodles (soaked) | 불린 당면 약간
- Water or chicken stock 2 cups | 물 또는 닭육수 2컵
Sauce | 양념장

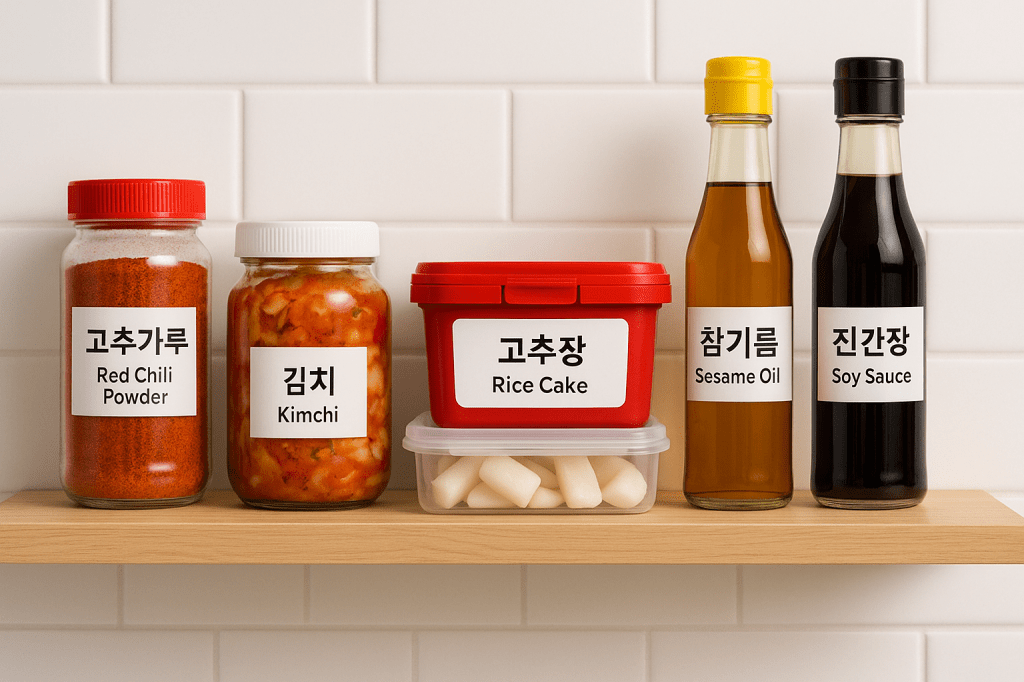
- Gochujang 2 Tbsp | 고추장 2큰술
- Soy sauce 2 Tbsp | 간장 2큰술
- Sugar 1 Tbsp | 설탕 1큰술
- Garlic (minced) 1 Tbsp | 다진 마늘 1큰술
- Chili flakes 1 Tbsp | 고춧가루 1큰술
- Sesame oil 1 tsp | 참기름 1작은술
- Pepper to taste | 후추 약간
🔥 How to Cook | 만드는 법
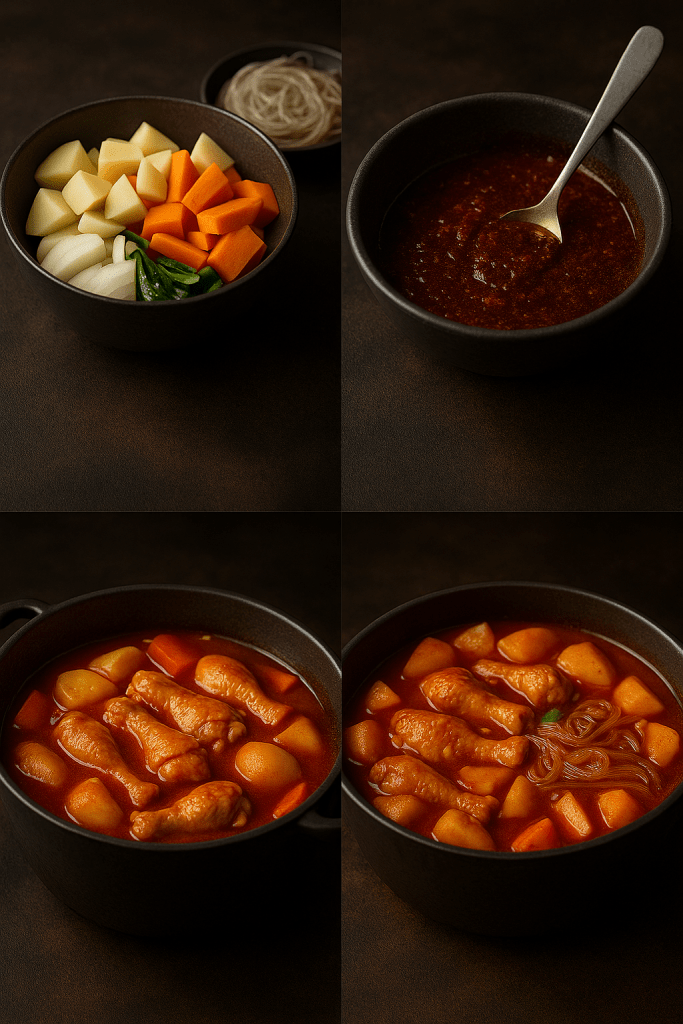
1️⃣ Prepare the ingredients.
Cut potatoes, carrots, and onions into bite-sized chunks.
Soak glass noodles in warm water for 10 minutes.
감자, 당근, 양파는 한입 크기로 썰고, 당면은 따뜻한 물에 10분 정도 불려둡니다.
2️⃣ Make the sauce.
In a bowl, mix gochujang, soy sauce, sugar, garlic, chili flakes, and sesame oil.
양념장 재료를 모두 섞어 준비합니다.
3️⃣ Cook the chicken.
In a pot, add chicken and sauce, then pour in water or stock.
Boil over medium heat for 10 minutes.
닭고기와 양념장을 냄비에 넣고 물(또는 육수)을 부어 중불에서 10분간 끓입니다.
4️⃣ Add vegetables.
Add potatoes, carrots, and onions, then simmer for 20–25 minutes until tender.
감자, 당근, 양파를 넣고 20~25분간 뭉근히 끓입니다.
5️⃣ Finish with glass noodles.
Add soaked noodles and cook 3–5 minutes until the broth thickens.
불린 당면을 넣고 3~5분 더 끓여 국물이 걸쭉해질 때까지 조리합니다.
🍯 Tasty Tips | 맛있게 먹는 꿀팁

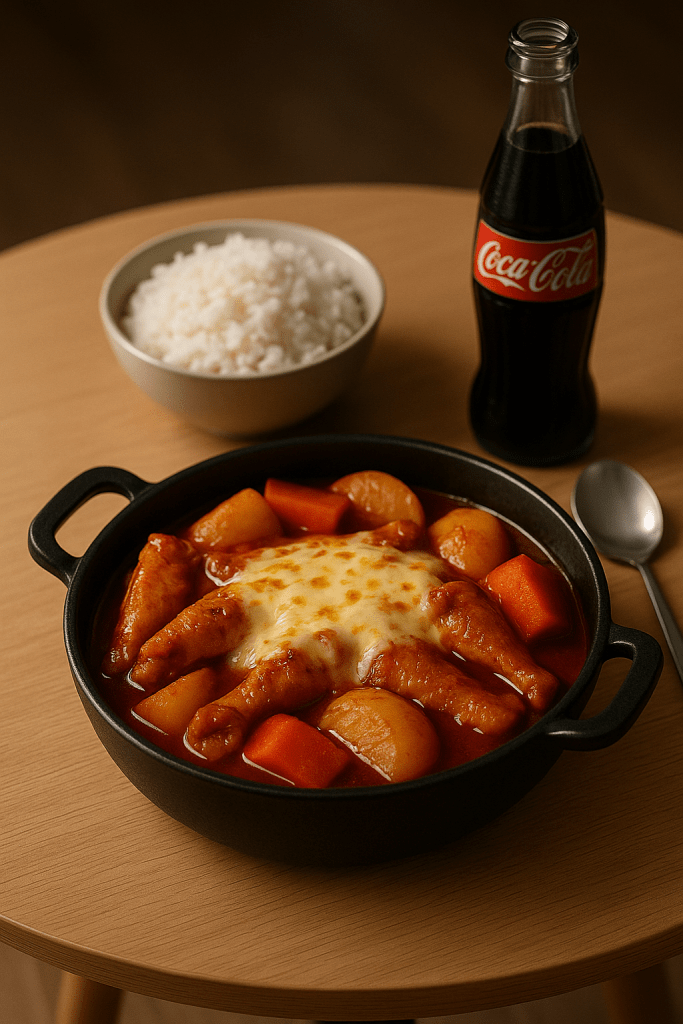
- Add cheese on top just before serving for a creamy, spicy mix. Mozzarella melts beautifully into the sauce.
- Serve it with a bowl of steamed rice — it balances the spice perfectly.
- If you like heat, sprinkle extra chili flakes or add Korean green chili (cheongyang pepper).
- Add instant noodles or rice cakes (tteok) at the end for a heartier version.
- The next day, reheat the leftovers and mix them with rice — it tastes even better.
- 치즈를 올려 먹기: 모짜렐라 치즈를 올려 살짝 녹이면 매운 양념과 어우러져 부드럽고 고소해요.
- 밥과 함께: 매운 양념에 흰쌀밥을 비벼 먹으면 완벽한 조합이에요.
- 매운맛 강화: 청양고추나 고춧가루를 추가하면 칼칼하게 즐길 수 있어요.
- 당면·떡 추가: 마지막에 라면사리나 떡을 넣으면 한 끼 식사로 든든해요.
- 다음날 즐기기: 남은 양념에 밥을 비벼 먹거나 볶음밥으로 만들어도 최고예요.
🛒 Shopping Tips in the U.S. | 미국에서 재료 구입 팁
Most ingredients for Dakbokkeumtang are easy to find in U.S. grocery stores or Asian markets.
- Chicken: Use “drumsticks,” “thighs,” or “bone-in chicken pieces.” Korean markets often sell “whole cut chicken” labeled as Samgyetang Chicken or Stewing Chicken.
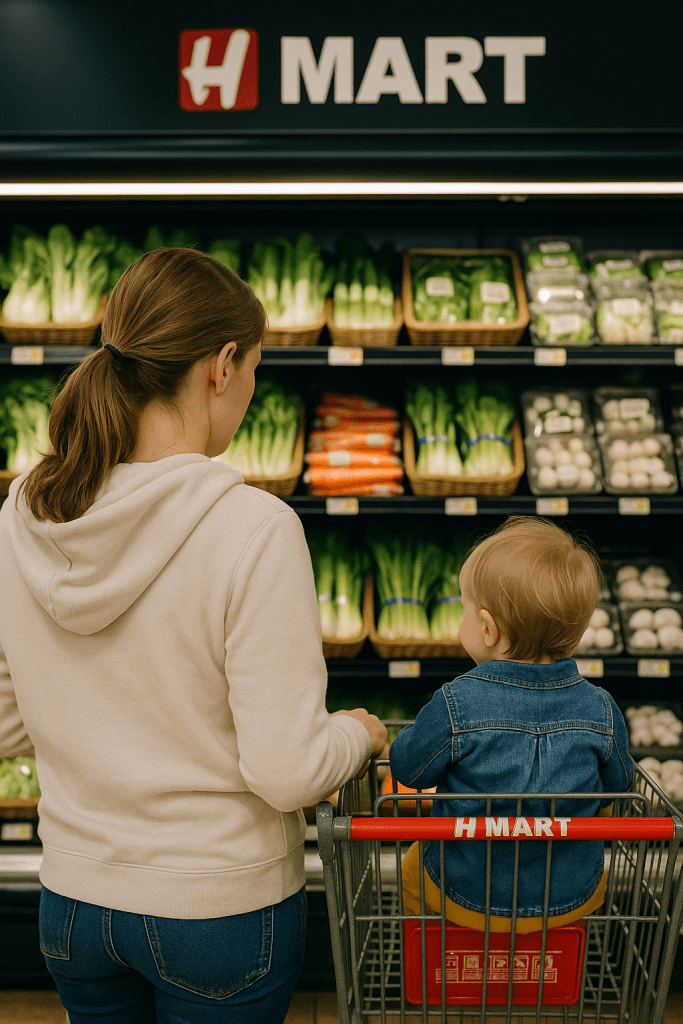
- Gochujang (Korean red chili paste): Available at H Mart, Asian grocery stores, or online (Amazon, Walmart).
- Glass noodles (Dangmyeon): Look for sweet potato starch noodles in the Korean or Asian section.
- Stock & Vegetables: Regular grocery stores (like Kroger, Publix, or Trader Joe’s) carry potatoes, carrots, and onions perfect for this dish.
미국에서도 닭볶음탕 재료는 쉽게 구할 수 있어요.
- 닭고기: Drumsticks, Thighs, Bone-in Chicken Pieces 중에서 고르면 좋아요.
한인마트에서는 Samgyetang Chicken 또는 Stewing Chicken으로 표시된 토막닭을 팔기도 합니다. - 고추장: H Mart나 아시안 마트, 아마존·월마트에서도 쉽게 구매할 수 있습니다.
- 당면: Sweet Potato Starch Noodles 또는 Glass Noodles 이름으로 판매돼요.
- 야채와 육수: 일반 마트(Kroger, Publix, Trader Joe’s 등)에서도 감자, 당근, 양파는 쉽게 구할 수 있습니다.
📖 Origin of Dakbokkeumtang | 닭볶음탕의 유래
Dakbokkeumtang, also known as spicy braised chicken stew, is a traditional Korean dish made by simmering chicken and vegetables in a gochujang-based sauce.
It’s believed to have originated in the mid-20th century, when chicken became more widely available and affordable in Korea.
The dish was especially popular among families because it could feed many people with simple, everyday ingredients.
닭볶음탕은 닭고기와 채소를 고추장 양념에 졸여낸 한국의 전통 가정식 요리예요.
1950년대 이후 닭고기가 대중화되면서 집집마다 손쉽게 만들어 먹기 시작했어요.
감자, 당근, 양파 등 흔한 재료로 많은 인원을 배불리 먹일 수 있어
가족식, 손님맞이 음식으로 인기를 얻게 되었습니다.
Dakbokkeumtang isn’t fancy — it’s simple, spicy, and always satisfying.
Perfect for those days when you just want something warm, filling, and full of flavor. 🍗🔥